Wednesday, June 15, 2011

In the wars again!

Esme's hand, all bandaged up.

Our little accident-prone girl has been in the wars again! On Tuesday afternoon she managed to burn herself on the door of our wood heater. She's actually quite good about keeping away from the fire and knows not to touch it but this was a bit of a freak accident. She was 'dancing' near the fireplace, spun around, lost her balance and brushed the sides of two fingers against the glass door. I was standing right next to her when it happened but couldn't do a thing! We got the burnt fingers under water straight away but it didn't take long for them to start blistering. I thought it best to take her down to emergency to get it checked out just in case. After 3 loooong hours of waiting we were finally seen by a doctor who pronounced the burns 'superficial' and got the nurse to bandage her fingers up. Esme was such a brave girl throughout the whole ordeal. Her finger was obviously bothering her but (for the most part) she kept a smile on her face. Today we get to take the bandage off and see how it all looks.

I shudder to think how much worse this could have been though. The burn that she got from simply brushing her fingers against the door for 1 or 2 seconds is incredible. Of course, I knew that the door to the fire was dangerously hot but I thought that we were safe because the kids were aware that they were not to touch or go near the fire. It's just made me aware that freak accidents do occur and maybe we do need to put the guard up around the fire again. It's too easy for the kids to lose their balance, trip, or fall near the fireplace. An important lesson for us all I think as to how easy these sorts of accidents happen.

Esme doesn't seem too perturbed by her bandaged hand!

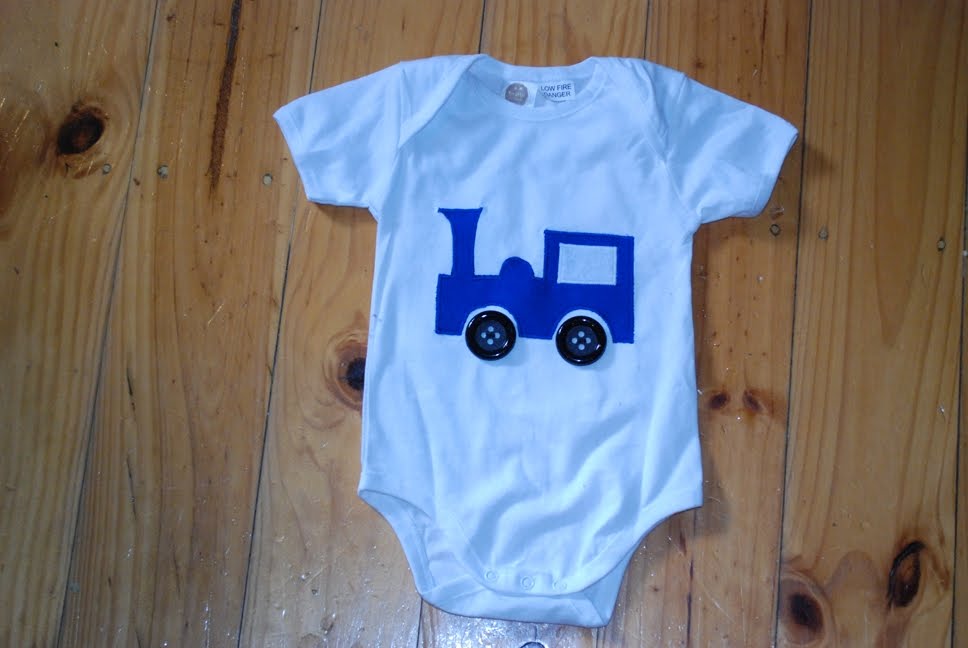
Some more applique

I've finally had a chance to sit down and do some more sewing lately. With only a few weeks to go until this next baby arrives I thought I'd better do some while I still have a bit of spare time! I've been inspired to make some little boy's and girl's matching sets. I'm feeling more inspired to make boy things lately so thinking maybe that's a sign that this next bub will be a boy. Time will tell I guess ;) Anyway, here is what I have been making...


I've got a couple more appliqued tops in the works and also want to make a start on a first birthday present for a friend's little one (his birthday isn't till September but I would like to be prepared ;))

Thursday, June 2, 2011

Five

Jacob turned 5 at the end of May (I'm still trying to get my head around my little boy being 5!) We celebrated with a special dinner chosen by Jacob on the night. He chose chicken stuffed with sun dried tomatoes and wrapped in prosciutto - what a connoisseur!

Then on the Sunday we made a trip to Diamond Creek Railway to share lunch with friends and take a ride on the miniature railway. Jacob is truly obsessed by trains and was so thrilled to go on the railway! It was such a beautiful day to be out and about.

Here's a couple of photos from his celebrations...

Opening presents on the day of his birthday

Birthday cake on his actual birthday

A special birthday lunch with friends at the Diamond Creek Railway

The train cake that Chris made

The train we went on!

Soooo excited to be riding the train!

Lots of things to see!

And a steam train (which we unfortunately didn't get to go on ;))

Happy Birthday to my beautiful boy - I love you more and more each day!

Sunday, May 29, 2011

Homemade Facepaint

We've been experimenting with homemade facepaint here recently. It all started because I was doing a theme about clowns with the kids I taught at school. I wanted them to experience having their face painted like clowns. There are quite a few allergies among the kids I teach so I didn't really want to purchase commercial facepaint as I wasn't sure what sort of 'extras' it would have in it.

This facepaint is what we came up with. It is made using a combination of sorbolene (we used a good quality sorbolene from the chemist which didn't contain any sort of 'extras'), cornflour, water and food colouring. It works well although it is quite thick. It also doesn't last long. As soon as it is dry it tends to flake off (although I personally prefer this to having to scrub faces to get facepaint off!)

Jacob with his moon and star (he had a cold hence looking like he had been crying!)

As you can see from the pictures, I need a little more practice with my artistic skills ;) However, the kids enjoyed having their faces painted and happily sat and had them done.

Esme asked for a heart on her cheek

Here's the recipe for anyone interested:

Facepaint:

1 tbsp sorbolene
2 tbsp water
6 tbsp cornflour
food colouring

Mix sorbolene with water, gradually add cornflour (don't do this too quickly or else you will get a lumpy mixture). Add food colouring as desired.

That's it really - a simple, no-fuss way to make facepaint!

Week 8 of decluttering: The bookshelf

This week's decluttering task was to clean up the bookshelf! It's become a bit of a dumping ground for all sorts of odds and ends lately. It was also time to do a bit of a book cull. While we love books here and would happily keep them all forever, we just don't have the room to do so. So, it was time to get rid of some of the books that we don't often use or that we have never read.

Books to go to the op shop...yep, another big bagful of stuff!

After sorting out which books to keep or donate to the op shop, I re-sorted the bookshelf into different sections, tidied up all the odds and ends and gave it a dust (don't remember the last time that happened!) And here's the end result:

The bookshelf all tidied and sorted!

Much nicer to look at than the bookshelf before! Next week I am going to attempt to declutter the laundry cupboard. I have avoided doing so for a looooong time!

Sunday, May 22, 2011

Week 7 of decluttering: The Yard

I've had a bit of a busy week this week and will freely admit to not getting around to any decluttering. So I am cheating and posting a decluttering project that we did a few weeks ago. I wasn't really involved in this project so I can't claim credit for it. All the work was courtesy of hubby, FIL and BIL.

Before we started the other side...

We've been having trouble with mold in our house for a little while. During Winter the house heats up inside and forms condensation which runs down the inside of the windows causing the mold to build up. There is always condensation on the windows during Winter no matter what time of day and it's steadily been getting worse since we've been in this house. We don't have a lot of light in the bedrooms during Winter due to some conifers that had grown completely out of control so we decided we would cut these down as a first action for getting rid of the mold. I wish we'd taken so more pictures before we'd started chopping down the trees but we all got a little excited ;) This photo is taken of one of the conifers before it was chopped down (there were two originally - one of either side).

Of course, the kids enjoyed 'helping out' with this task. I didn't see them for most of the day as they were so busy outside.

Jacob shovels the sawdust and does some digging

Esme tries on the gloves for size.

We were left with a huge pile of branches at the end of the day. Luckily, my FIL came back with a mulcher the following weekend and he and hubby got rid of most of this pile. We had a lovely pile of mulch to put on the garden!

The pile of branches we were left with (actually this was only from one tree!)

The end result of clearing these two trees was amazing. For those of you that know our place you will see what I mean in these photos. I'm still getting used to the amount of light in our room at night and being able to see into the bedrooms from the driveway but I'm sure it won't take long. I do love having more light upstairs during the day though and it's already seemed to have made a difference with the amount of condensation on the windows.

Looking towards the entrance to the house, previously you wouldn't have been able to see the steps or this bedroom window!

Looking the other direction, towards the carport.

If anyone has any more suggestions for how to minimise mold, please feel free to share! Our next step after clearing these trees is to add ventilation to the bedrooms upstairs (yep, there was none added in the building of this house!!) and changing the exhaust fan in the kitchen to vent out of the house (it is vented into the kitchen currently!!)

Sunday, May 15, 2011

Week 6 of decluttering: The Kid's Clothes (part 2)

Remember what the pile of clothes the kid's had outgrown looked like last week? Just in case you have forgotten, here's the link ;) Well, I'm pleased to say that the project is finally finished! It's been a bit of a mammoth task but here's the final result...

The kid's clothes, finally sorted into some sort of order!

The new system is designed to be a bit more user-friendly than before ;) Here's how it works: clothes are sorted into sizes and boy/girl/unisex clothes. I also have a box with singlets of different sizes as we use the same singlets for both boy and girl (I found I was pulling them out of different bags before and making a big mess before). The clothes are stored in clearly labelled space bags. There are two labelled plastic bags for the size of clothes the kids are currently wearing and as they grow out of them I will put them in the bags and pack them into the space bags once they have finally finished with that size.

I have to say though that I am not a fan of space bags at all! I love the idea of them but after one use they seem to somehow get holes in them, no matter how gentle I am with them. A bit annoying really as I buy the proper 'space bag' brand too...

I pack the clothes into space bags and clearly label them with sizes/boy/girl/unisex clothes


Singlets are stored all together in different sizes in this box

I'm feeling a huge sense of relief now this project's finished! Perhaps I'll try a smaller project next week...
Related Posts with Thumbnails