Breastfeeding the second time around has certainly been a much easier experience. I think a lot of it has to do with how my two children were born and how breastfeeding was approached in the early days by my caregivers. This is the story of Jacob's birth, the difficulties we had in establishing our breastfeeding relationship and what happened when Esme was born. I hope you enjoy it!
Jacob’s birth:
Two days before Jacob was due, I woke up just after midnight with a contraction. At first, I wasn’t sure if it was really labour or not. I’d heard so many stories about first babies being overdue that I just assumed that it couldn’t be labour so soon! But, I got another contraction about 20 minutes later and after about 2 hours of these, I decided to wake up Chris. We stayed at home for a few hours but by then contractions were coming every 5 minutes so we decided to head into hospital (little did I know that there was still a long way to go!) Early on in the pregnancy we’d decided that were going to have our baby at a private hospital.
We arrived at the hospital about 5am and I laboured there until Jacob was born at 1.30 that afternoon. The birth was fairly uneventful. I spent most of it in the bath but got out to birth Jacob. The birth was fairly natural, I guess as natural as could be in a hospital setting. I had gas during the labour but no other pain relief. When Jacob was born he was put on my chest and we were given quite a bit of skin to skin time.
The first feed:
After we’d had some skin to skin time, the midwife suggested that I should try to feed Jacob. I felt quite clueless about how to position and how to go about attaching him and I remember feeling grateful that the midwife was helping me so much! This was the same midwife we’d had for the birth and she was quite gentle and relaxed about everything. Jacob really wasn’t interested in feeding and wouldn’t open his mouth wide enough to attach. We tried a few times but ended up just putting him back on my chest. Soon after, the shifts changed and we had another midwife come in to look after us. She was quite forceful about trying to get Jacob attached. It was almost like she was trying to mash his face into my breast. I remember lying there and thinking this doesn’t feel right, surely it shouldn’t be like this. I was feeling upset and worried because Jacob wouldn’t attach and the midwife kept going on about ‘how important’ it was to get him attached in the first hour after birth! I was worried that this would mean I wouldn’t be able to breastfeed him. I had known all through the pregnancy that I wanted to breastfeed and felt upset that maybe I wouldn’t be able to. I didn’t even realise that at this stage I would still be able to express for him! I don’t remember what happened in the end. I know Jacob didn’t feed, but I can’t remember if it was then or later the midwives expressed colostrum from me to feed to him.
The first week in hospital:
We continued to have attachment problems during those first few days. Jacob was quite a sleepy baby so we had to wake him for feeds. At each feed, I would try to attach him but we’d have little success. The midwife would then have to express colostrum from my breasts and feed it to him by syringe. I was never even shown how to express the colostrum myself, although I guess at the time I wasn’t concerned, just grateful that people were helping me when I felt so clueless! It did feel a bit uncomfortable but I didn’t know any better and I certainly didn’t know that I could do it myself!
On the third day of our stay in the hospital, Jacob was admitted to Special care nursery (previously he had been rooming in with us). He had an eye infection and there were concerns that he may be having seizures because of his ‘jerkiness’. I strongly felt that this was normal as I’d often felt him move like that when I was pregnant with him but no one listened to me. I remember when the midwife came in to our room to take him. She told me that he ‘had to’ go to the nursery and I just burst into tears, feeling like my baby was being taken away from me and I had no control. I was already pretty emotional because of the after birth hormones and feeling like a failure because I couldn’t breastfeed him.
That was the start of a whole cascade of events. Jacob was put in an isolette in the nursery under observation and connected to a heart monitor so that we weren’t able to hold him, only put our arms through the tiny holes. We were assigned a paediatrician who, while lovely, was very ‘overzealous’. Jacob was subjected to a barrage of tests to check out what was happening with the suspected seizures. I remember sitting next to him in the nursery when the paed was talking to us and just dissolving into tears. The first night that he was in the nursery he had to have a lumbar puncture. We were told it was better that we weren’t with him when it was done so we sat in our room. We could hear his screaming from the nursery. All Chris and I could do was hold each other while it was happening. For ages afterwards, Jacob was really sensitive on his back and I contribute this to the lumbar puncture.
The paediatrician also advised us that Jacob would need top up feeds of ABM. This was quite shattering for me. If I’d know then what I know now I would not have allowed this to happen. I didn’t have a huge supply of milk but I had enough. By this stage, I was able to use the electric pump to express as my milk was starting to come in and I was able to express a fair bit. Although it never fully ‘came in’ until day 6. I didn’t realise that I could have a say in this sort of stuff, that as long as Jacob was showing all the signs of a good supply I didn’t need to supplement his feeds. To us, the paediatrician was ‘god’. He knew everything and we knew nothing as first time parents.
Around this time also, one of the midwives suggested we try Jacob on the bottle. I didn’t know about ‘nipple confusion’ at this stage so I readily agreed. Surely, it would be an easier way to feed than with a cup or syringe?! Jacob took to the bottle easily. I am however grateful that he didn’t get ‘nipple confusion’. Although there’s no way to really say that his continuing attachment problems weren’t, in part, due to this.
We continued the next few days with trying to attach Jacob at each feed, supplementing expressed milk with ABM and using the bottle. I would go to the nursery to feed him or they would tell me when they thought he needed a feed. He was probably feeding every 3-4 hours at this stage. There was an incident that happened one night that I got particularly upset about. I got up and went to the nursery to feed Jacob. When I got there, I was informed that Jacob had already had a bottle of ABM! I was absolutely furious!! Not only had they fed him when I had made my wishes clear that I wanted to try attaching him at each feed BUT they hadn’t even checked if there was EBM to use in the fridge (which there was!) I felt so violated by this incident and felt as if the staff weren’t respecting my wishes.
On the last night of our hospital stay, a lovely LC there suggested we try a nipple shield. We both agreed that even though a nipple shield wasn’t ideal, it meant that Jacob could attach ‘straight to the source’ so to speak and I didn’t have to pump and feed! I can’t describe just how happy I was the moment he attached to the breast with the nipple shield. I think the LC was just as excited as me too!!
Going home:
The next morning we left hospital. It was day 6 and my milk was just coming in. I suffered terribly from engorgement and oversupply despite using a nipple shield. I guess it didn’t really help that, in hospital, some the midwives had told me that I would probably need to express while I was using the nipple shield as it could affect supply (Talking to people recently about nipple shields, I haven’t met anyone who’s had trouble with supply because of using a nipple shield and can only say that perhaps this was the case in the past when the nipples shields were made of quite thick plastic). Anyway, we’d hired an electric pump when we thought I’d have to express full time so Iafter most feeds I was expressing with this which didn’t help the oversupply issue! No one had explained to me about supply and demand at this stage! I ended up with mastitis. I only realised it was mastitis as I remembered reading a handout the health nurse had given that had mentioned something about high temperatures and flu-like symptoms. I felt terrible but didn’t do anything about it. We were seeing the health nurse that day so I chatted to her about it. She gave me some advice on what to do. Two days later I had an appt to see the LC at the hospital. She agreed it was mastitis and was amazed that I had put up with it for so long. At the appointment she was able to help me clear the blockage. I did see the GP the following day but by that stage I was getting better.
Over the next month or so, we began to wean Jacob off the nipple shield. I was very lucky that the hospital where I’d had him offered free sessions with a lactation consultant. Unfortunately, this is no longer the case and I feel so sad that other people having trouble breastfeeding will no longer have this help. With the help of the LC’s, I was able to devise a plan of how I was going to wean Jacob from the nipple shield, ask questions about concerns I had and just generally feel supported in my quest to breastfeed! I become rather impatient to breastfeed without the nipple shield though. I, rather stupidly, felt that using a nipple shield to feed wasn’t really breastfeeding ‘properly’. I suffered from badly cracked nipples in those days which were so painful. Jacob would often be vomiting blood from all the blood he had ingested while feeding. I ended up dreading feeds and the pain that came with them. Yet, I would sit there trying to get him to open his mouth wide, and trying time and time again to get him on properly. I would be in tears from the pain and sense of failure but I was also getting really angry at Jacob, wondering what was wrong with him because he couldn’t attach! In hindsight, I wish that I hadn’t rushed Jacob to breastfeed without the nipple shield. I wish someone had said to me, ‘you know, it doesn’t matter that he’s feeding with a nipple shield’.
After about a month we were able to let the nipple shield go for good. Breastfeeding still didn’t feel quite right. But it wasn’t casing damage to my nipples so I just assumed that was how it was meant to be. About this time I joined up to the ABA and started going to my local group shortly after. I also joined the online forum. I found a lot of support from both of these.
5 months down the track:
Breastfeeding continued to feel not quite right and when Jacob was about 5 months old, I again suffered problems. I ended up with quite a badly cracked nipple again and then got a blocked duct on top of that! It was a horrible time. I remember one night Jacob went longer without a feed overnight and my breasts were so full and sore, especially with the blocked duct, I had to get up to express. I couldn’t get the milk to flow and all I ended up with in the pump was a drop of blood from my cracked nipple. Luckily, by this stage I knew where to go for help. I rang the helpline and also a counsellor from my local group as well. Even if they couldn’t really help me, they were able to support me and reassure me that things would work out. This is what got me through this difficult time.
The crack in my nipple lasted a long time; I even ended up going to the GP to find out if it was an infection. It wasn’t, it was just a very deep crack that took a long time to heal. The crack had healed by the time Jacob was about 7 months old and all of a sudden breastfeeding just seemed to click! I didn’t feel pain any longer and I was actually enjoying feeding Jacob. It was incredible! I don’t know what it was although I have always questioned whether Jacob had an undiagnosed tongue tie. Actually, when I was seeing my midwife when pregnant with Esme, she happened to see inside his mouth and said to me, ‘he’s got a tongue tie! Did you have trouble breastfeeding him?’ I can’t tell you the sense of relief I felt when she said that. It was like someone, finally, had been able to answer why our breastfeeding relationship was just so darn hard. I’m very pleased to say though, that despite these difficulties establishing a breastfeeding relationship, Jacob is still feeding at almost 3 ½!
Esme’s homebirth:
After the experiences we had with Jacob’s birth and the difficulties we had in establishing our breastfeeding relationship in hospital, we decided that our next child would be born at home. We wanted care providers who we would get to know intimately during the pregnancy and who shared similar thoughts on birth and breastfeeding.
I went into labour with Esme at about 9am in the morning. Contractions actually started while I was breastfeeding Jacob. The labour started slowly and gradually with contractions every 10-20 minutes that were quite gentle. Chris came home from work at about 11.30 and we spent most of the day together as a family. My mum turned up about 4pm to look after Jacob who was going to be present at the birth. At about 5pm contractions suddenly picked up and started coming one on top of each other. I was quite surprised by the sudden intensity of them! We rang our doula and our midwife who were on their way immediately. Our doula arrived first and while she was here I felt the urge to push. Luckily though, Esme waited for our midwife – just! About 20 minutes after she arrived, Esme made her way into the world. Although we’d planned on a waterbirth, Esme had other ideas and arrived while I was kneeling on the ground, holding onto Chris. Our midwife passed her through my legs and into my arms (after I had taken my top and bra off – Esme had arrived so quickly that I was still half dressed!) I was overjoyed when I found out we had a little girl. The moments after her birth are so vivid and I remember the intense joy I felt. I don’t remember Jacob’s birth in the same way and I contribute this to having had gas during his birth.
The first feed:
After all I have said about Jacob’s first feed, there is surprisingly little to say about Esme’s first feed! After sitting, holding her against my chest on the floor I moved to the couch. I remember needing to be careful as she had quite a short cord! As I birthed the placenta, I cradled Esme in my arms at my breast. She just seemed to know what to do and nuzzled at my breast and automatically attached. I was amazed and so thrilled that our breastfeeding had gotten off to such a great start. Jacob came down from upstairs (he had been having a bath) to see Esme having milk which was beautiful.
From that first feed with Esme, she continued to do well with breastfeeding. I never suffered any soreness or cracked nipples (apart from a small cracked nipple that Jacob caused because his attachment was a bit off!). I did have engorgement and an oversupply again this time but I knew what to do to help relieve this and it never ended up as mastitis.
Factors involved in successful breastfeeding the second time round:
I strongly believe that the attitudes our caregivers had in relation to birth and breastfeeding; that it was natural, normal and not to be interfered with; had a lot to do with the success of our breastfeeding relationship. Esme was allowed the time to show instinctual behaviours and to come to the breast when she was ready, rather than being forcefully attached. Our caregivers also trusted that we knew our baby best and so supported our choices. Throughout the pregnancy, I had made it clear my thoughts on breastfeeding. We also had a birth plan meeting a couple of weeks before she was born where I expressed my wishes to use baby led attachment.
Health professionals need to be educated about the best practices in establishing a breastfeeding relationship. I’m not saying that hospitals are bad in supporting women to breastfeed (and it should be noted that the hospital I was in was not a baby-friendly accredited hospital). Just that so many things were done that were not in the best interests of breastfeeding; the ‘forcing’ of the baby onto the breast instead of promoting baby-led attachment, introducing supplementary feeds, using bottles instead of syringes/cups for feeding and the midwives expressing my breasts, without the thought of teaching me how to express. A lot of the basics of breastfeeding were not really explained to me properly, I only had vague understandings of the let-down, supply and demand and so on.
A lot of it also has to do with knowledge and support. By the time I had Esme, I had been involved in ABA for a while and had support in the form of my local group. I was also a lot more educated about breastfeeding. I’d learnt a lot over the years from attending ABA meetings and also from being a trainee counsellor.
I think the bottom line is though, that as a second time mum you have a lot more confidence in yourself. I really doubted my ability to know my baby when Jacob was born and very much listened to what others were saying, even if their advice was not particularly accurate (particularly when it came to breastfeeding!) By the time Esme came along I’d let all that go. As a result, she has absolutely flourished.
After Jacob's birth: he was given skin to skin time but he never attached

After Esme's birth: this photo is blurry but it shows how Esme is initiating the attachment herself, something Jacob never did.

And she's on: with perfect attachment! Just shows what happens when you leave mother and baby undisturbed.


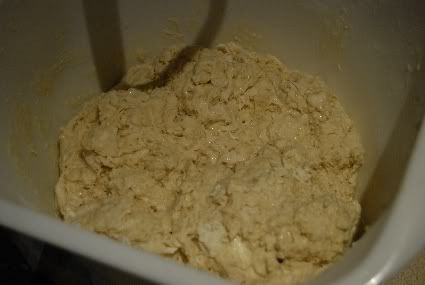
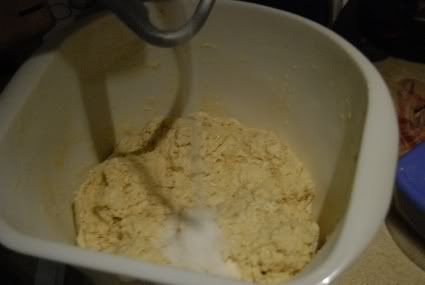 then start the mixer with a dough hook, on medium speed.