This bread is called a sourdough, ie. it has a nice sour flavour. What's different between sourdough and regular bread? Well, it's all in the yeast - regular bread usually uses instant dry yeast, or maybe fresh yeast if you have access to it (try your local delicatessen) and it is very reliable (well, instant dry yeast is, fresh yeast not so) - rise times when using the same amount of yeast each time at a certain temperature will be very consistent. Sourdough uses a wild yeast culture which has to be kept healthy and happy, else it will die - yeast and bacteria are living organisms, after all! The proofing times of a sourdough bread rely very heavily on the temperature that the dough is at and how healthy your starter culture (called from here on the "mother") was. The yeast provide the gas (carbon dioxide... stop baking bread to prevent global warming!), however in the mother there are some other organisms - bacteria - which break down sugars into tasty things like lactic acid (that's what makes your muscles burn at the gym) and acetic acid (vinegar) which provide the unique sour flavour.
Enough gasbagging, let's make some bread. Sourdough bread is a multi-day task, due to the nature of the yeasts and bacteria, so don't start if you haven't got the time to spare, or if you wanted to eat this with that soup you're having tonight.
Any day prior to Day 1
I'm going to assume you have a mother starter - if you'd like one, email me and I can send you some of the one I made from scratch. It takes a couple of weeks if you'd like to try it yourself. See our instructions here if you are interested in doing it yourself.
Refresh the mother - I usually take 10g of the culture, add 50g of water, whisk that until it's frothy then add 50g of bread flour and stir until combined. Cover and leave this overnight - it should at least double in size in this time. A very active starter will double in size in about three to four hours (you can achieve this by feeding your starter with the above ratio (1:5:5) every twelve hours for a few days). This is called a 100% hydration starter.
These instructions will make one 600g loaf. It is completely scalable, I usually make three at a time.
A note about flour: I call for bread flour in this recipe - I get mine from Simply No Knead and it is great flour. I'd strongly recommend using bread flour as it has a higher protein content than regular "all purpose" flour which results in a soft fluffy loaf. More on that later too.
A note about measurements: I weigh everything - even the water - it's the best way to get consistent results. I can't tell you how much all these things are in cups, and it's probably best not too as one cup here in Australia is a bit larger than one cup in the US. If you're going to make lots of bread, get a set of digital scales!
Day 1 – starter
You'll need:
- 7g mother
- 10g water
- 17g bread flour
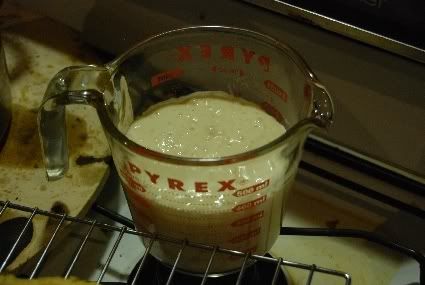
Whisk the mother and the water until frothy, then stir the flour in until completely combined. Cover with some cling film and leave overnight at room temperature. Here's what it will look like (this is actually a picture of my mother starter, but they'll look the same ;))
Day 2 - sponge
You'll need:
- all of the above starter
- 164g water
- 118g bread flour
- 34g wholemeal bread flour (called "whole wheat" flour in the US)
Again, whisk together the starter and the water, then add the two flours and stir until combined. Cover with cling wrap and leave for between 8 - 24 hours. 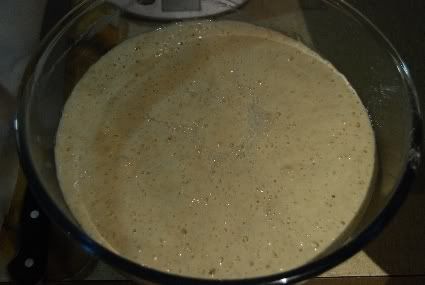
Day 3
You'll need:
- all of the above sponge
- 41g water
- 10g oil
- 46g bread flour
- 57g wholemeal flour
- 91g high protein (HP) bread flour (known as Pasta Dura flour in Australia)
- 5g salt
note about HP flour: if you don't have access to / can't be bothered getting it, just use regular bread flour instead. HP flour helps give a really nice crunchy crust and soft fluffy bread.
Once again, whisk the sponge with the water and the oil, then add the flours. Using a stand mixer, mix together until the flour is hydrated: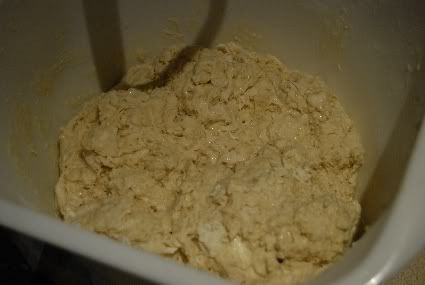
Cover with some plastic wrap and leave it to sit for between 30 minutes and 2 hours. This is called the autolyse, and allows the gluten to begin to develop. Gluten is the protein that makes bread dough nice and stretchy, it is comprised of two smaller proteins found in flour that have to stick together with some water to make gluten.
After the autolyse, add the salt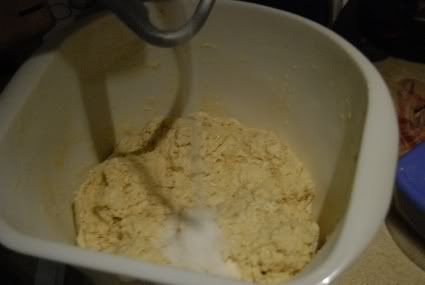 then start the mixer with a dough hook, on medium speed.

mix it...
some more... 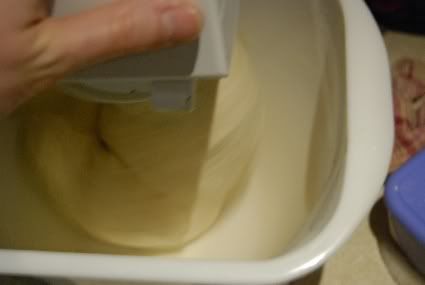
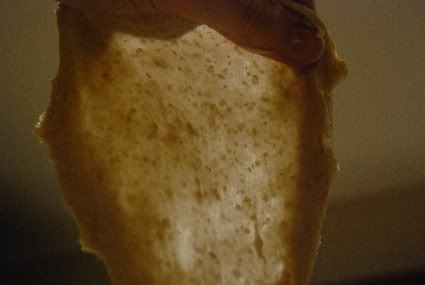
for about 6 minutes or until you can stretch a small piece of the dough into a windowpane (light can be seen through it)
At which point it is time for the primary fermentation, including a technique called stretch and fold, which is an excellent method for gluten development. If you have achieved the windowpane above, you already have good gluten development, however this will achieve the best results.
Tip the dough onto the bench. It should be tacky, but shouldn't stick to your hands much at all.
take one side, stretch it out... 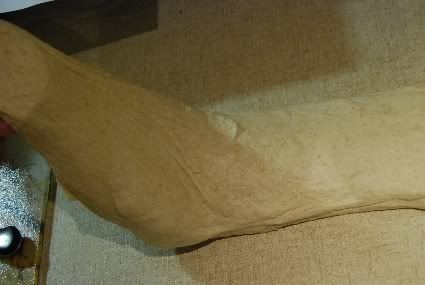
and fold it over the top of the dough. 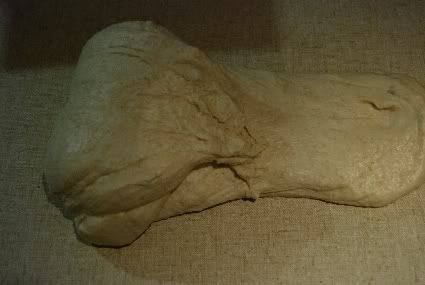
repeat with the second side... 
then spray with a little oil and cover with cling wrap. 
After half an hour, repeat the stretch and fold steps above, then repeat again after another half an hour. After the final stretch and fold, leave your dough to rise until about double in size - about another hour with an active starter in a warm room.
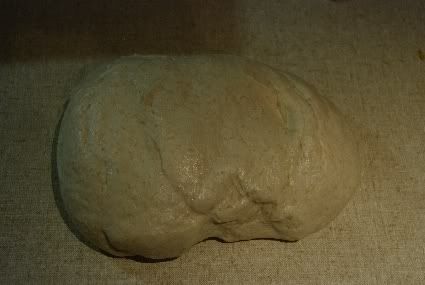
Once the dough has risen, deflate it and shape it into the shape you want, and put it on some baking paper. With this dough, I usually go for a free form round boule. 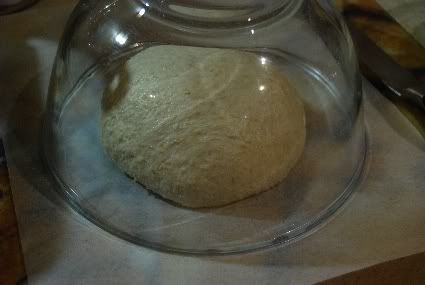
Cover with a bowl and leave to proof for 45 minutes.
Whilst the boule is proofing, preheat your oven as hot as it can go - mine's 260C (500F). If you have a pizza stone, preheat that - about the middle to bottom third of the oven is where you want the shelf, depending on your oven, of course. Finally, also preheat a large bowl that will comfortably fit over the boule and is, of course, able to withstand temperatures of 260C! 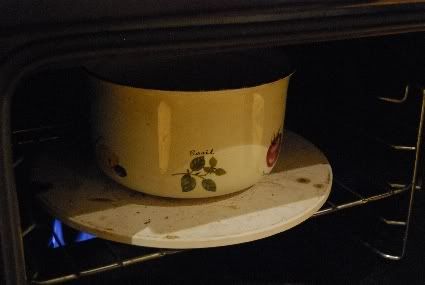
a note about high temperatures and ovens: Many modern ovens may not appreciate being preheated this high for this long - my parent has an auto-shutoff when it gets this hot, so you may need to work out what is best for you. The hotter, the better!
After 45 minutes, you're ready to score the bread and get it in the oven. Using a sharp serrated knife, cut a pattern in the top of the boule. I usually choose a cross, a square or a series of stripes. 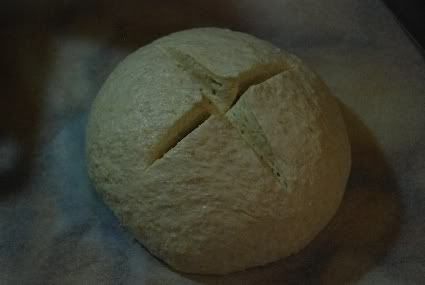
Working quickly, carefully move the hot bowl onto the door of the oven, and place the boule (and paper!) onto the hot stone. If you don't have a stone, just load the loaf directly into the oven on a baking tray. 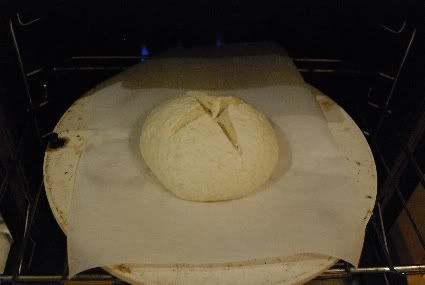
Place the bowl over the top of the loaf (remember, it's really hot!), gently slide it back in and shut the door. Set the temperature to 230C. 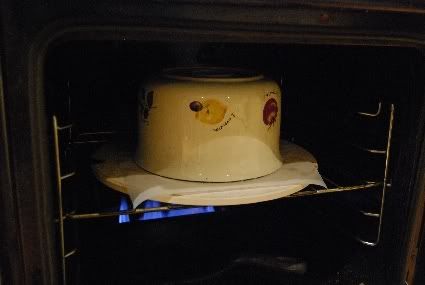
After 15 minutes, remove the bowl. Remember how hot it is... I've burned myself many, many times when my teatowel / glove slipped and I touched the bowl. Bake the loaf for another 30 minutes (or until it is golden), rotating it once about half way through: 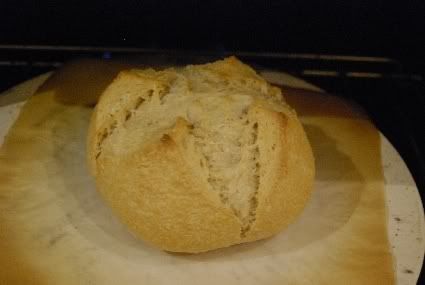
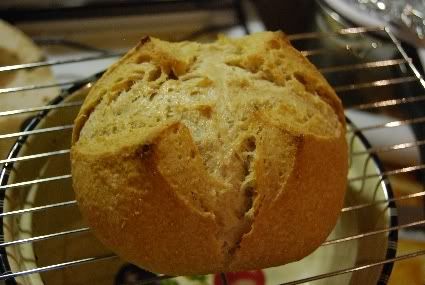
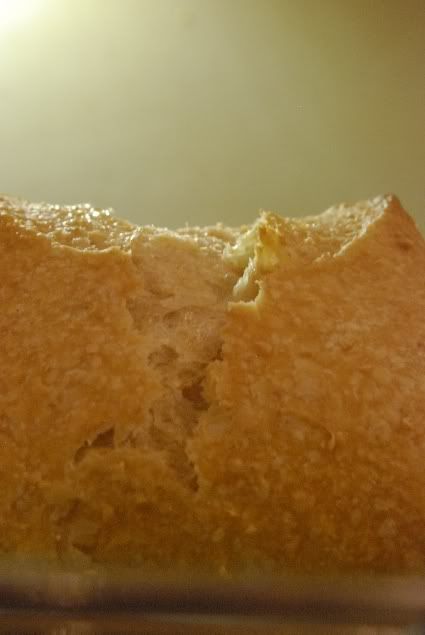
After it's done - it should be golden brown and smell great, with some nice blistered patterns on it - turn off the oven and leave the door partially open for about 10 minutes. Remove the loaf after this and leave to cool completely before slicing and eating :)

Any of the steps that used a mixer in this method can, of course, be done by hand - but I'm lazy, and can't be shagged kneading bread every day, except in a few special cases.
If you make a multiple recipe, you can refrigerate the dough in ziplock bags after the stretch and fold section. Refrigerate for up to 3 days, allowing the dough to return to room temperature before shaping and baking. The longer the dough is in the refrigerator, the bigger the tangy sour flavour will be, however you may get less spring (rise) in the oven - the gluten in the dough will have been affected by enzymes released by the bacteria called proteases, which basically just cut protein up into little (useless) bits.
For those dollar conscious, like me - the whole reason I started to bake bread at home instead of buy it was how much cheaper it was - a 600g loaf of this costs around 91c to make. Go to your local artisan baker and see how much it costs to buy - I recently was in one and a 520g sourdough loaf costs over $6!
Thanks for reading.
Chris
2 comments:
Wow great tips thanks. Mine never stretched, I mixed it longer and still couldn’t get it to stretch out, it would break. I’ll have to give your methods ago next time I try this bread.
Oh and I’m loving the photo’s of the mixing great photography
Here is a link to my first attempt. It was quite dense and a little too browed but oh so yummy
http://www.lrc.asn.au/forum/viewtopic.php?t=42439&highlight=sourdough
ohhhh! I so have to try this again. I neglected my started and it grew blue fur... sigh.
Post a Comment